
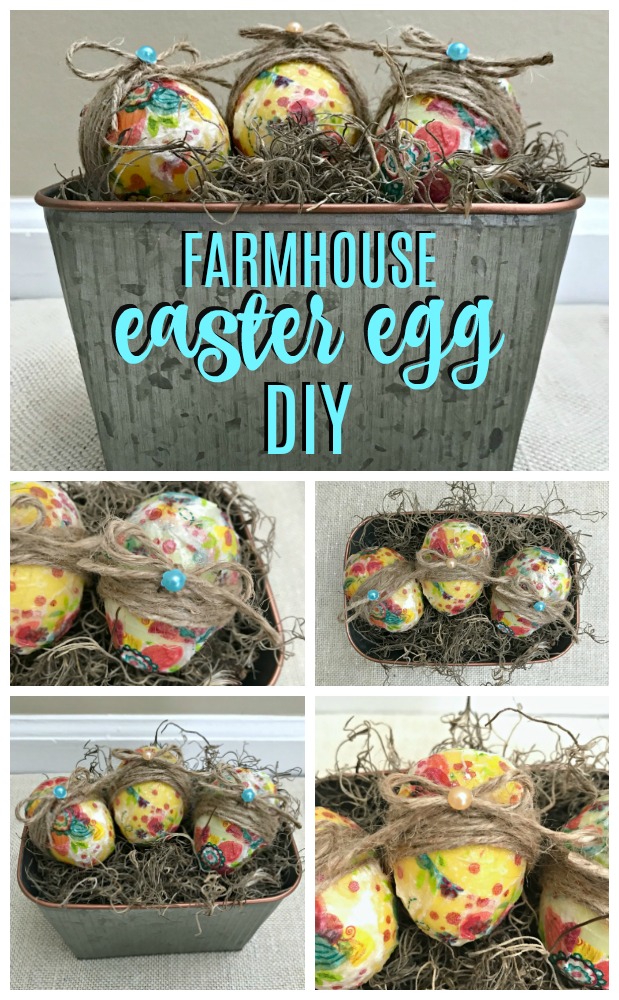
Flipping through my Victoria magazine last weekend, I was inspired by the beautiful artisan Easter eggs they showcased. You can purchase a kit for $50 to create a set of artisan eggs just like the ones in the magazine…but I decided to make a version that was a little less complicated – and a lot more frugal – using things I had on hand!
Mine certainly are not artisan quality, but they made for a fun weekend project that would add a fun touch of spring to almost everyone’s decor! I was able to make them almost completely with things I had on hand and that’s always a win in my book.
Here’s what you’ll need:
- Plastic Easter Eggs
- Mod Podge
- A Sponge Brush
- Decorative Paper Napkins, Magazine Clippings or Scrapbooking Paper – I used paper napkins from Dollar Tree for this tutorial
- Embellishments: ribbon, jute, beads, gems – whatever you like
Here’s how to make the eggs!
- Cut the napkins into small squares, and then cut those in half diagonally to make a bunch of triangles.
- Using the brush, coat the back of your first triangle with a later of mod podge and lay it on the egg. The first one that goes on is tricky – it might slide around a bit until you get a few pieces on your egg. Don’t worry!
- With the rest of the pieces, you’ll probably only have to lay the napkin triangle on the egg and brush over it with your mod podge. You might even use your fingers to smooth them down – just be careful not to tear the napkin when it’s wet.
- Continue until the egg is completely covered with the napkin. Don’t worry if it’s not smooth or even if pieces are sticking up or buckled. You can fix it later.
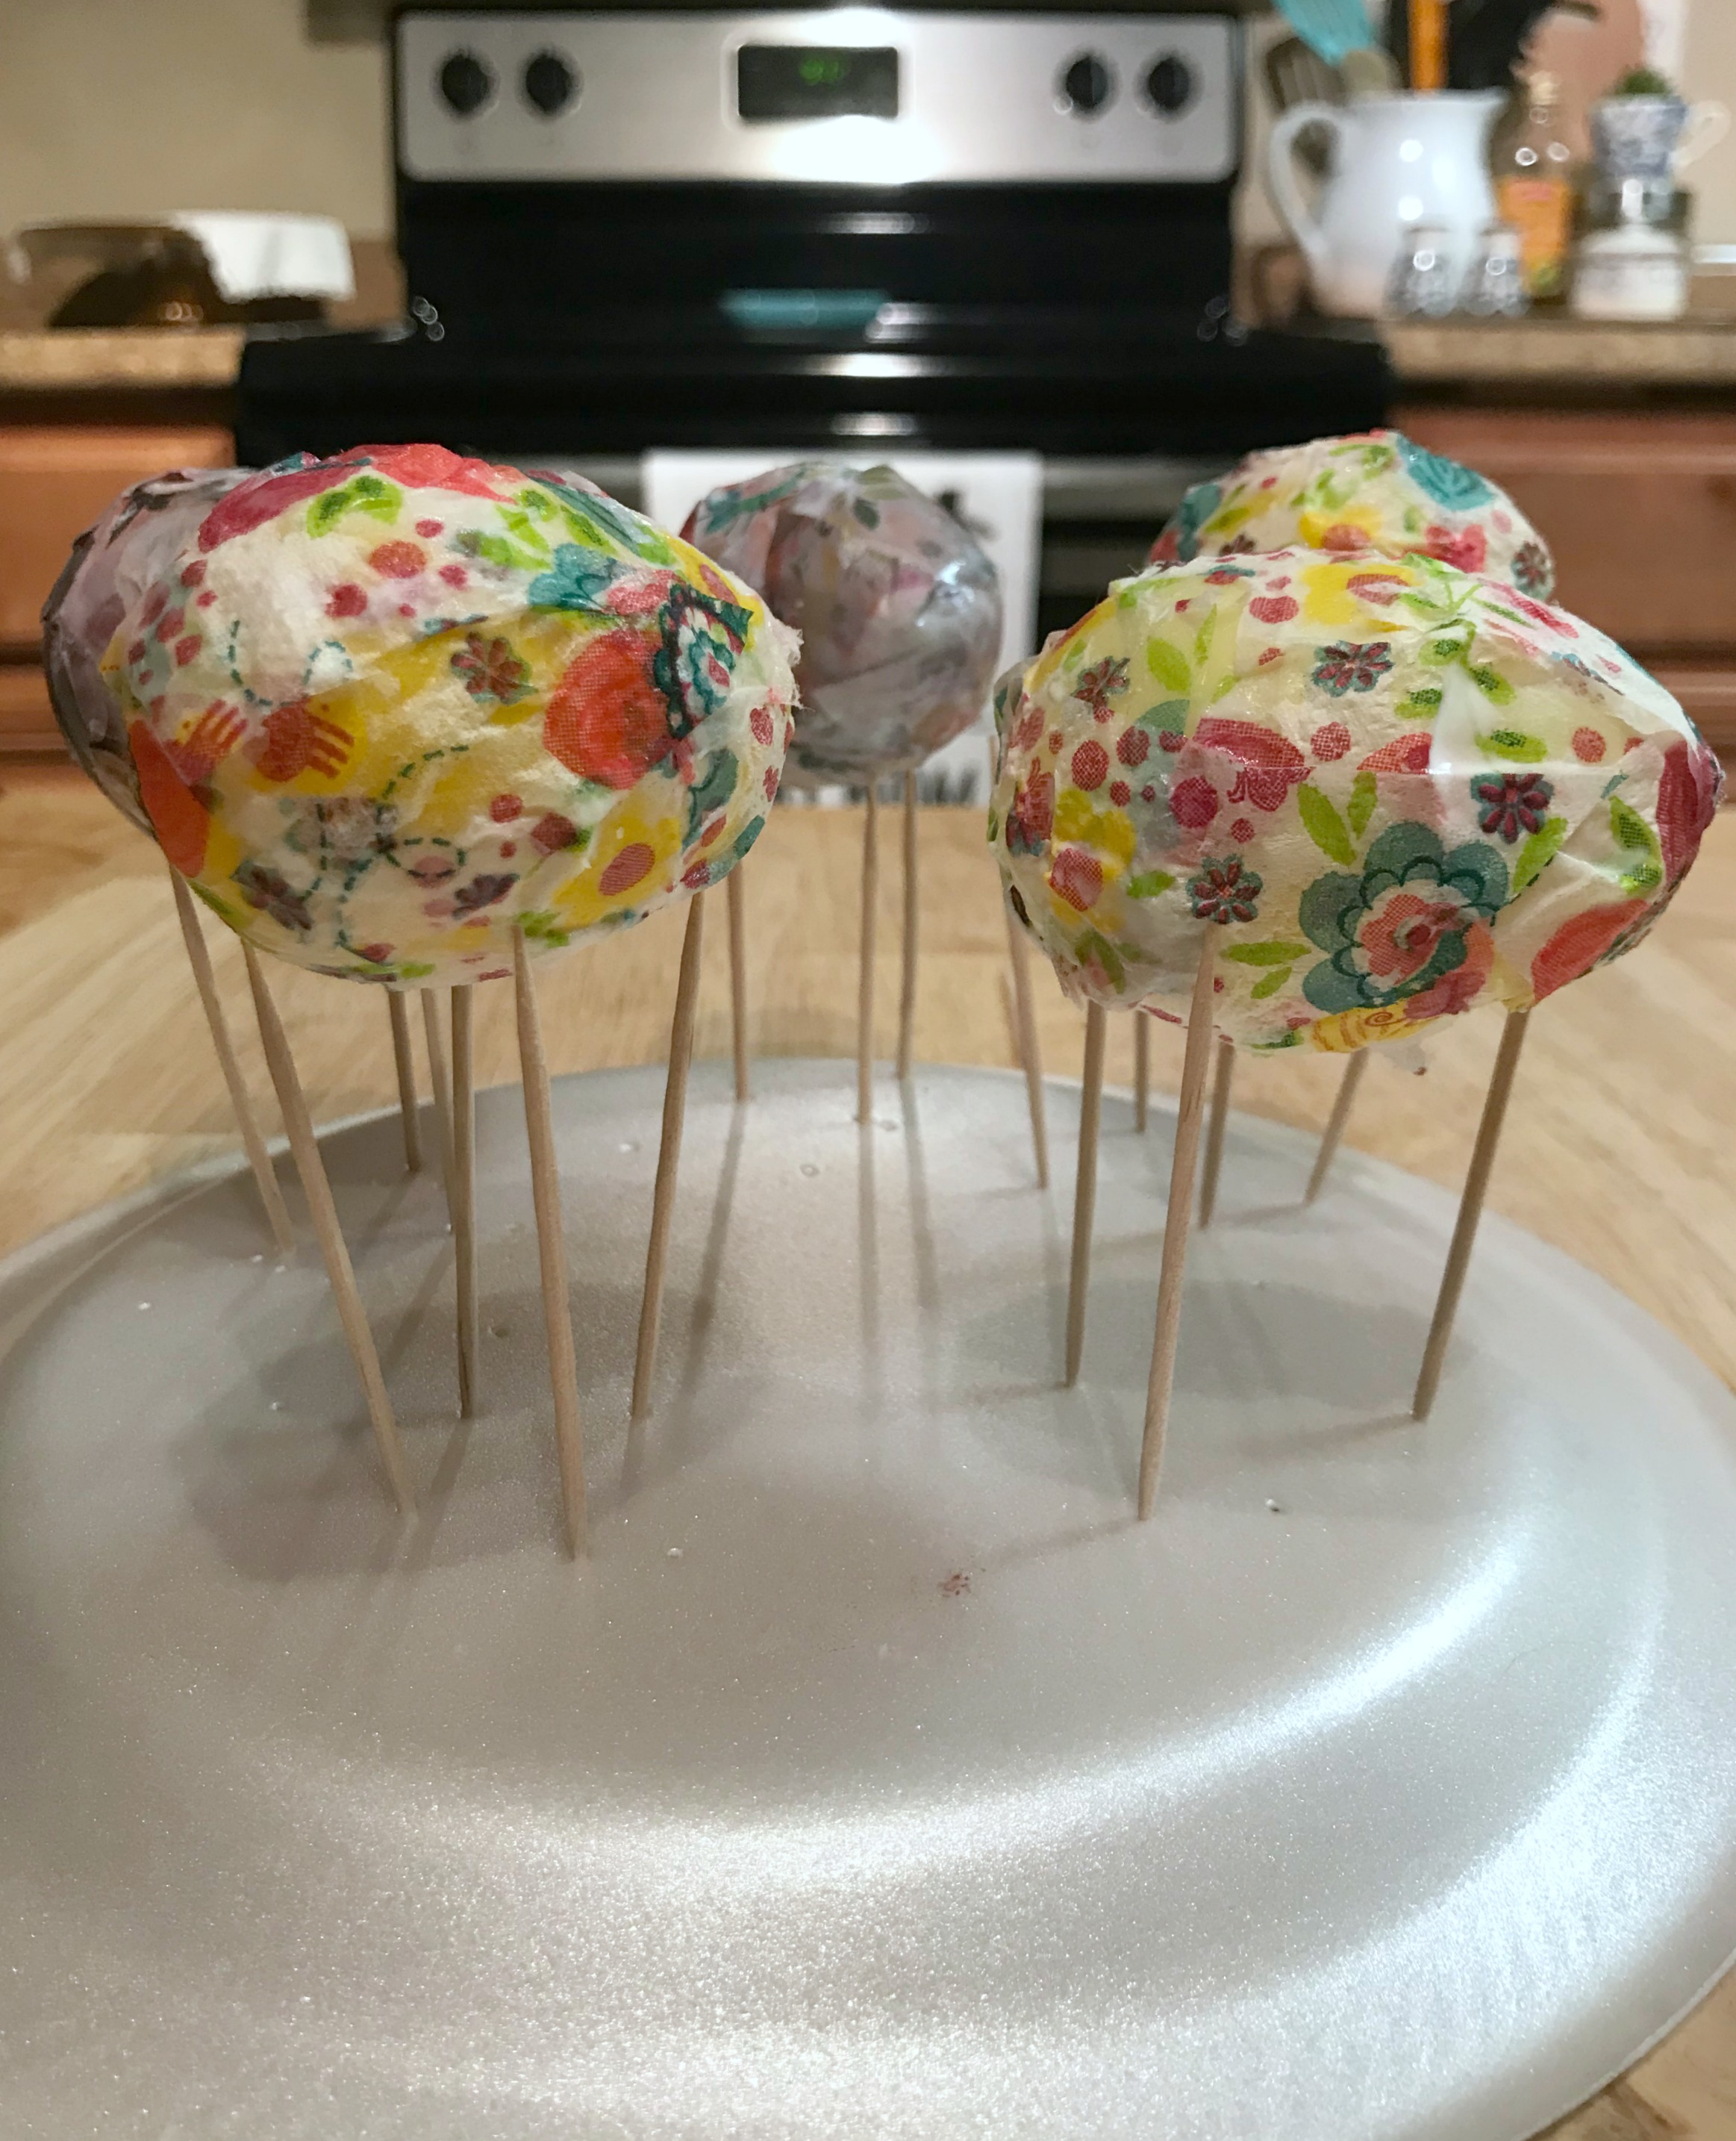
- Let them dry overnight, with as little of the surface resting on something as possible. See my funny little styrofoam plate/toothpick contraption below – this worked well!
- At least 12 hours later, go back over the surface with the brush and mod podge, smoothing it down with the brush and/or your fingers. You might need to do 2 coats like this to get the smooth finish you want, depending on the thickness of your paper.
- Let dry completely and then embellish – I’ll show you that step below.
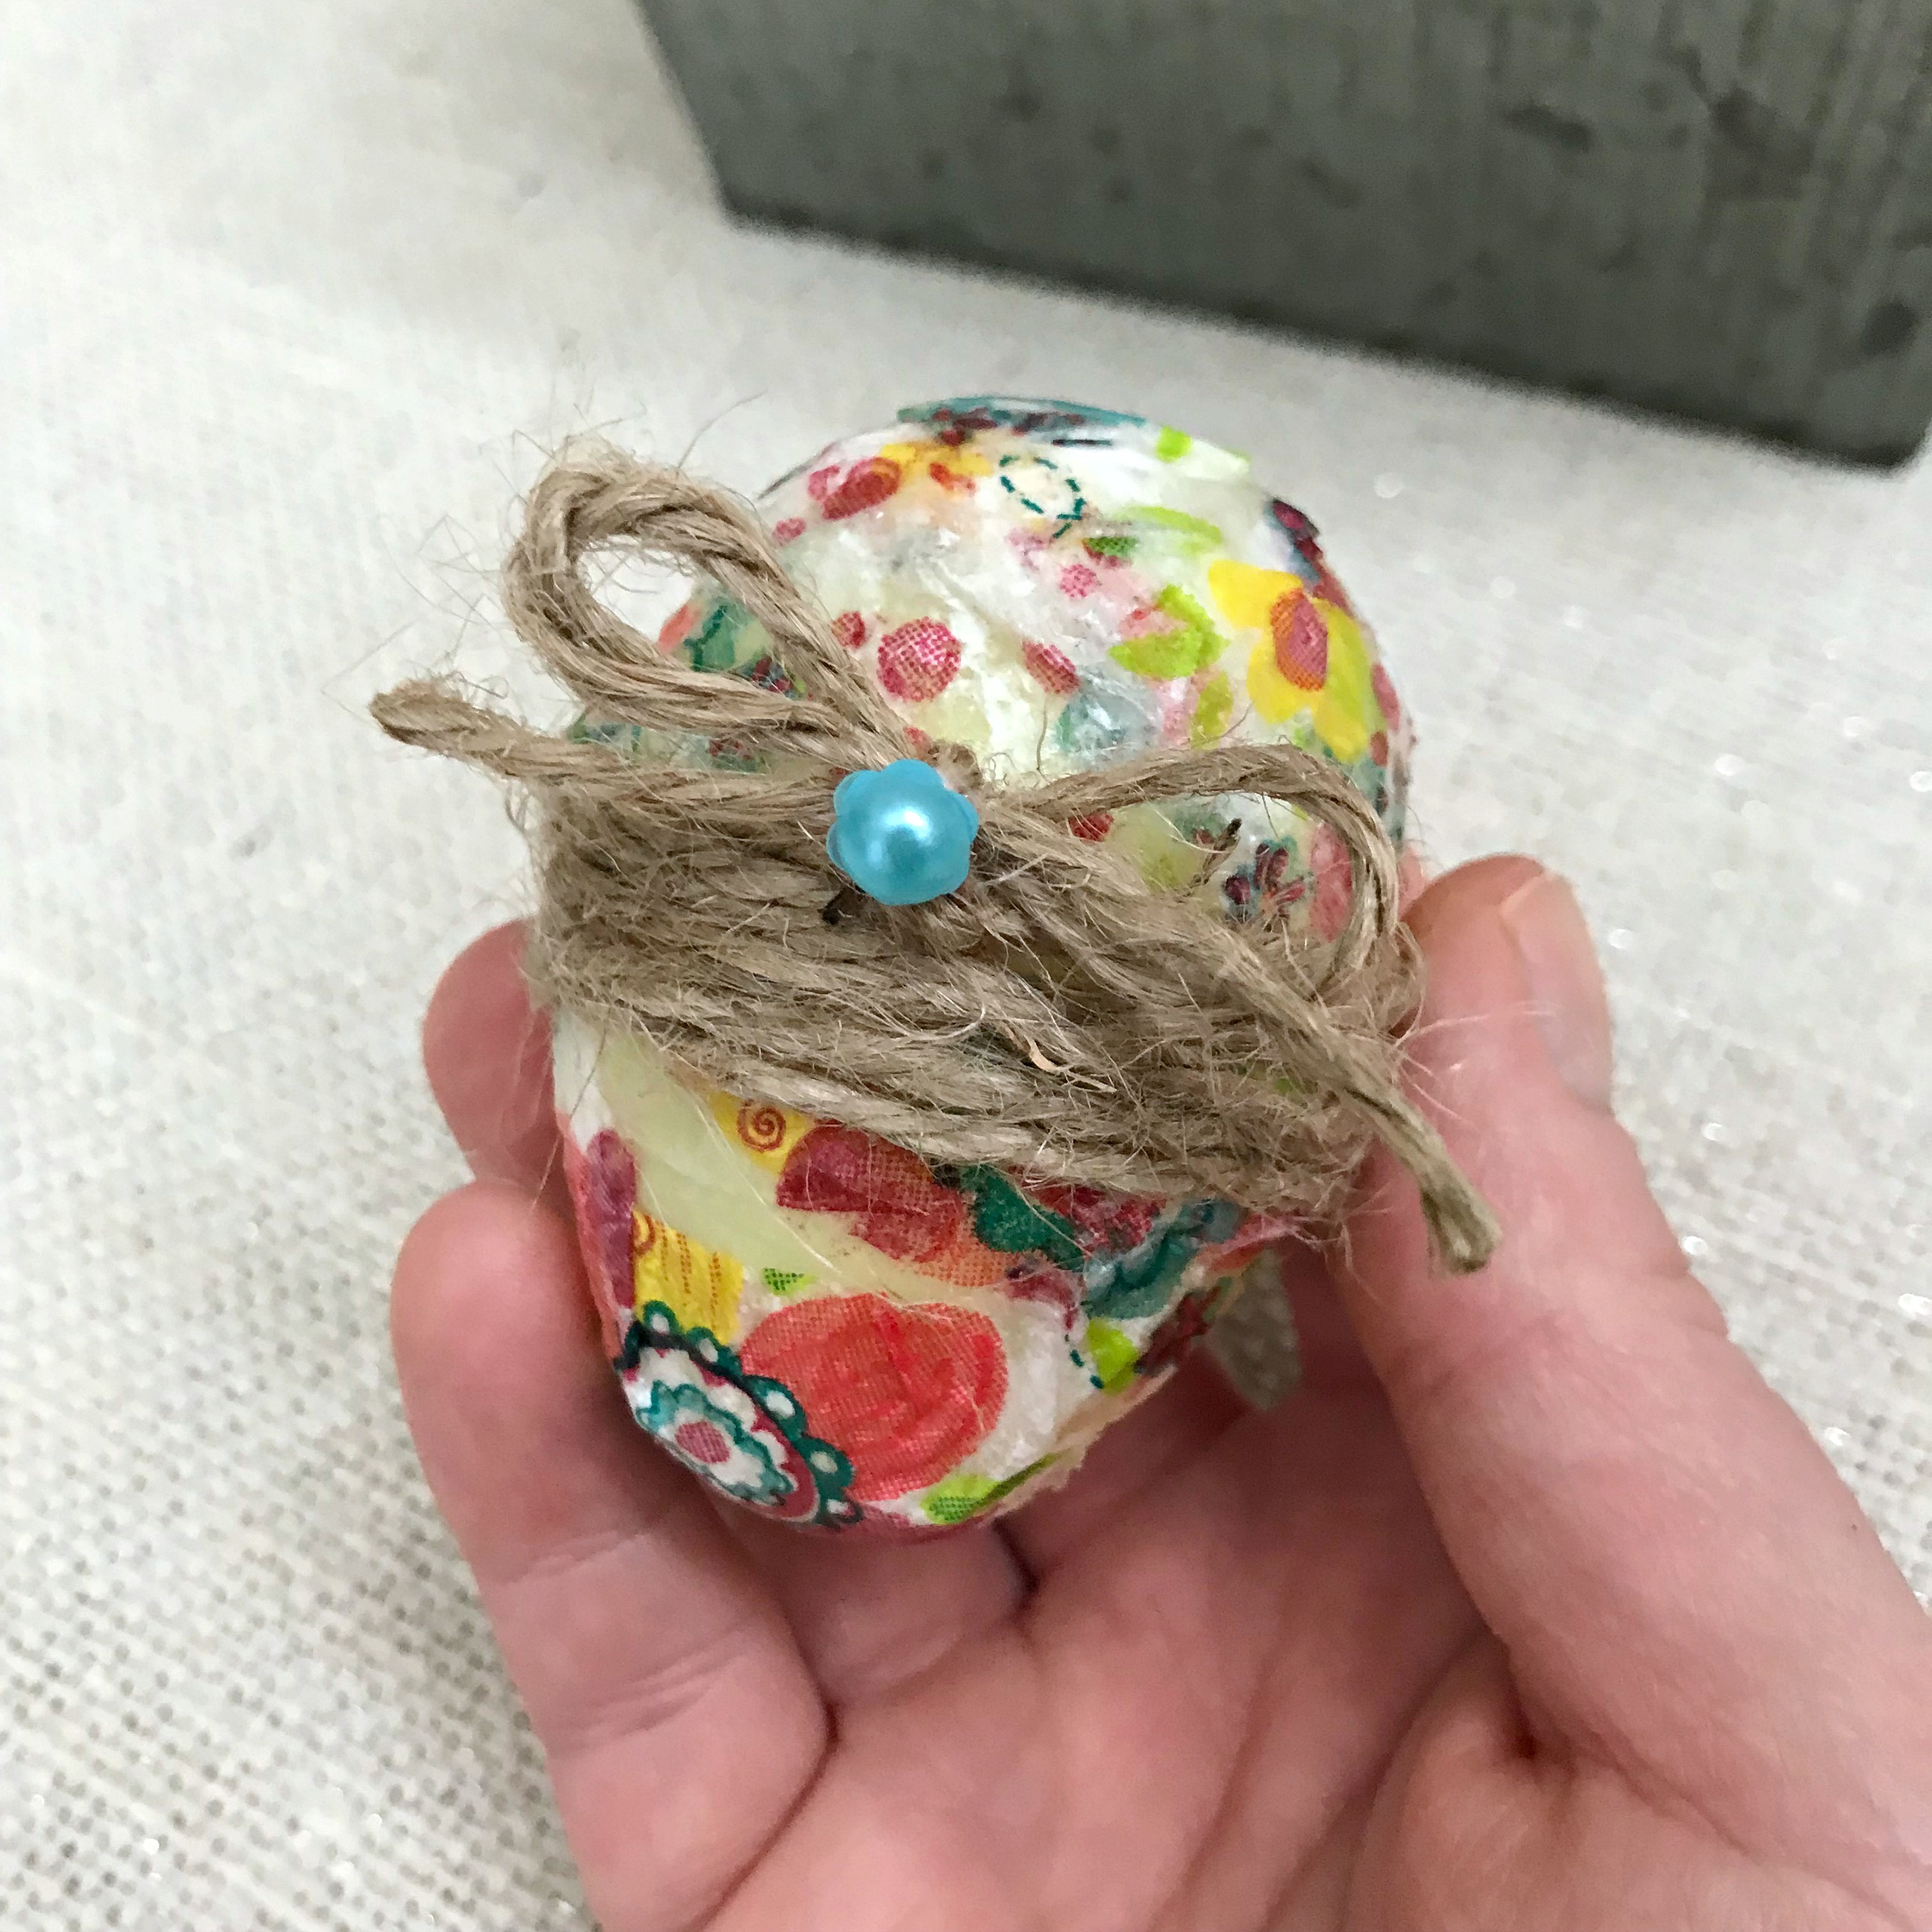
I found that I really didn’t love how my eggs looked until they were embellished – I was afraid they looked like something a child made in school! 🙂 Once I added the jute, I was much happier with my project. I simply laid the egg in the middle of a long piece of jute and wrapped the string around the egg until the pieces met to tie a bow.

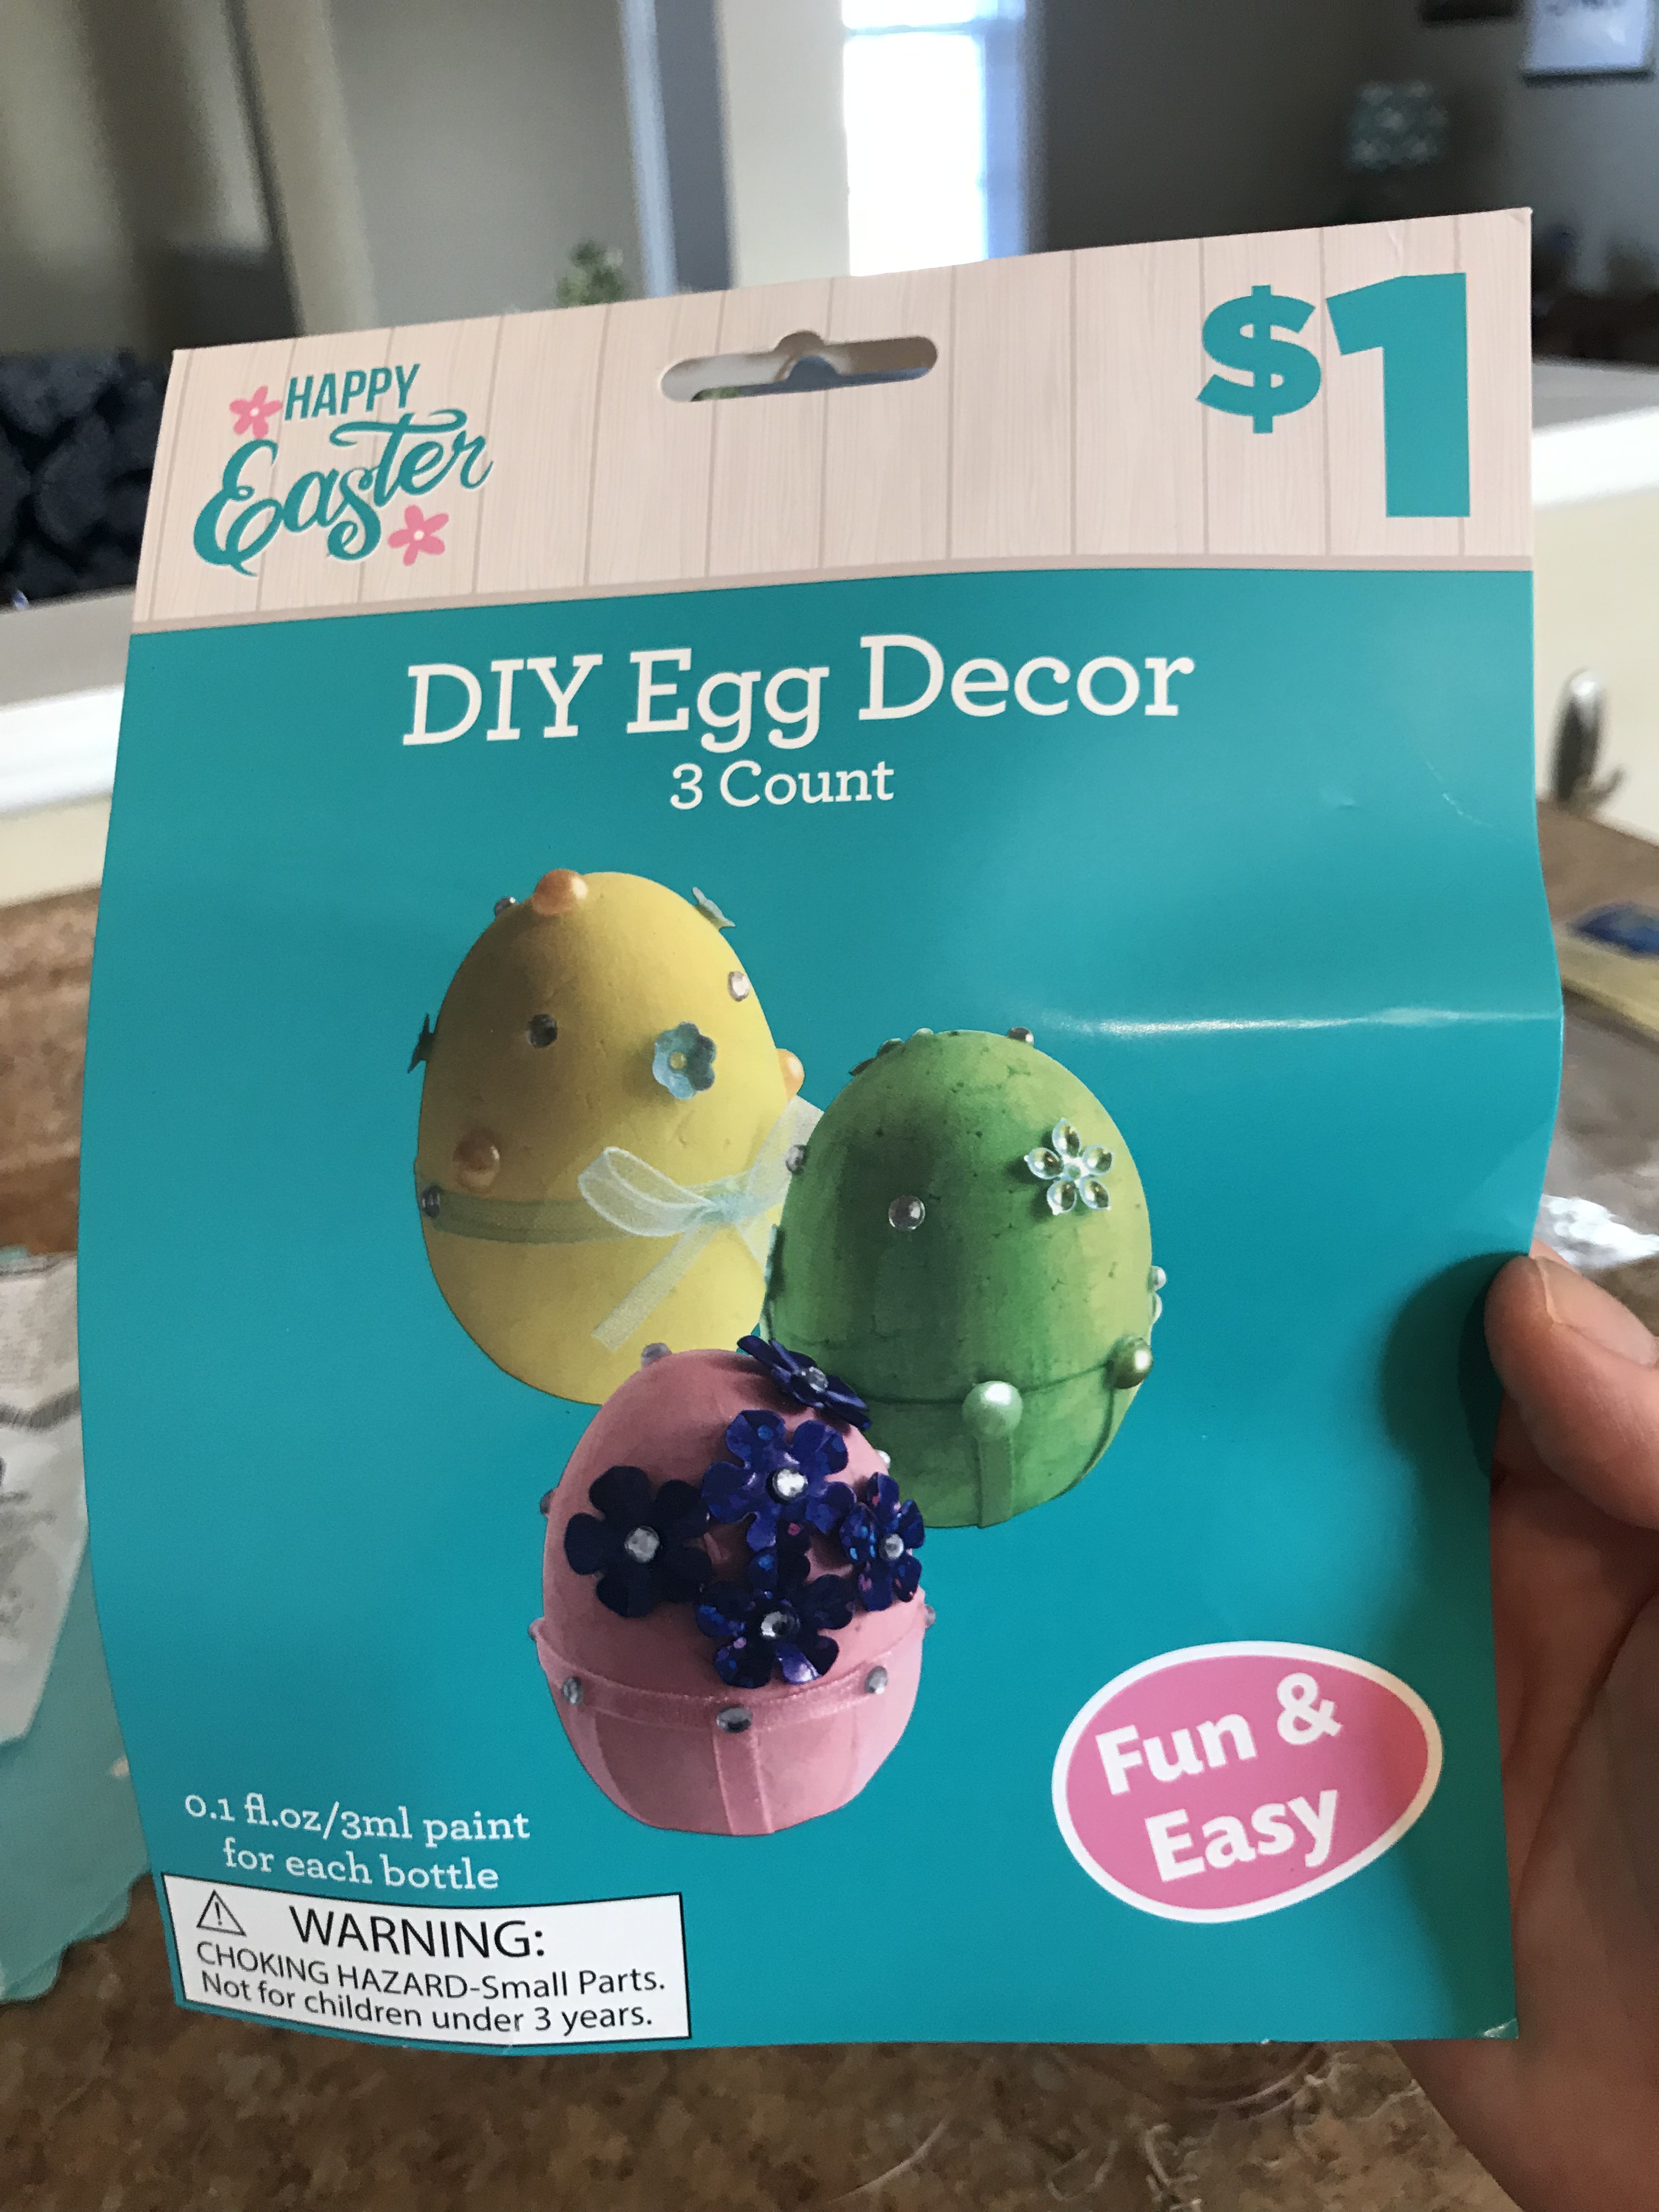
You can use anything you want to finish off the embellishments! I was looking for some cute buttons or something similar at Dollar General when I came across these kits for $1! The only things I used from the kit were the little jewels you see in the center of my bows, which I attached using a bead of craft glue.
The kit came with enough beads and gems to do a dozen eggs, at least! However, the styrofoam eggs that are included would be perfect as a base for this project.
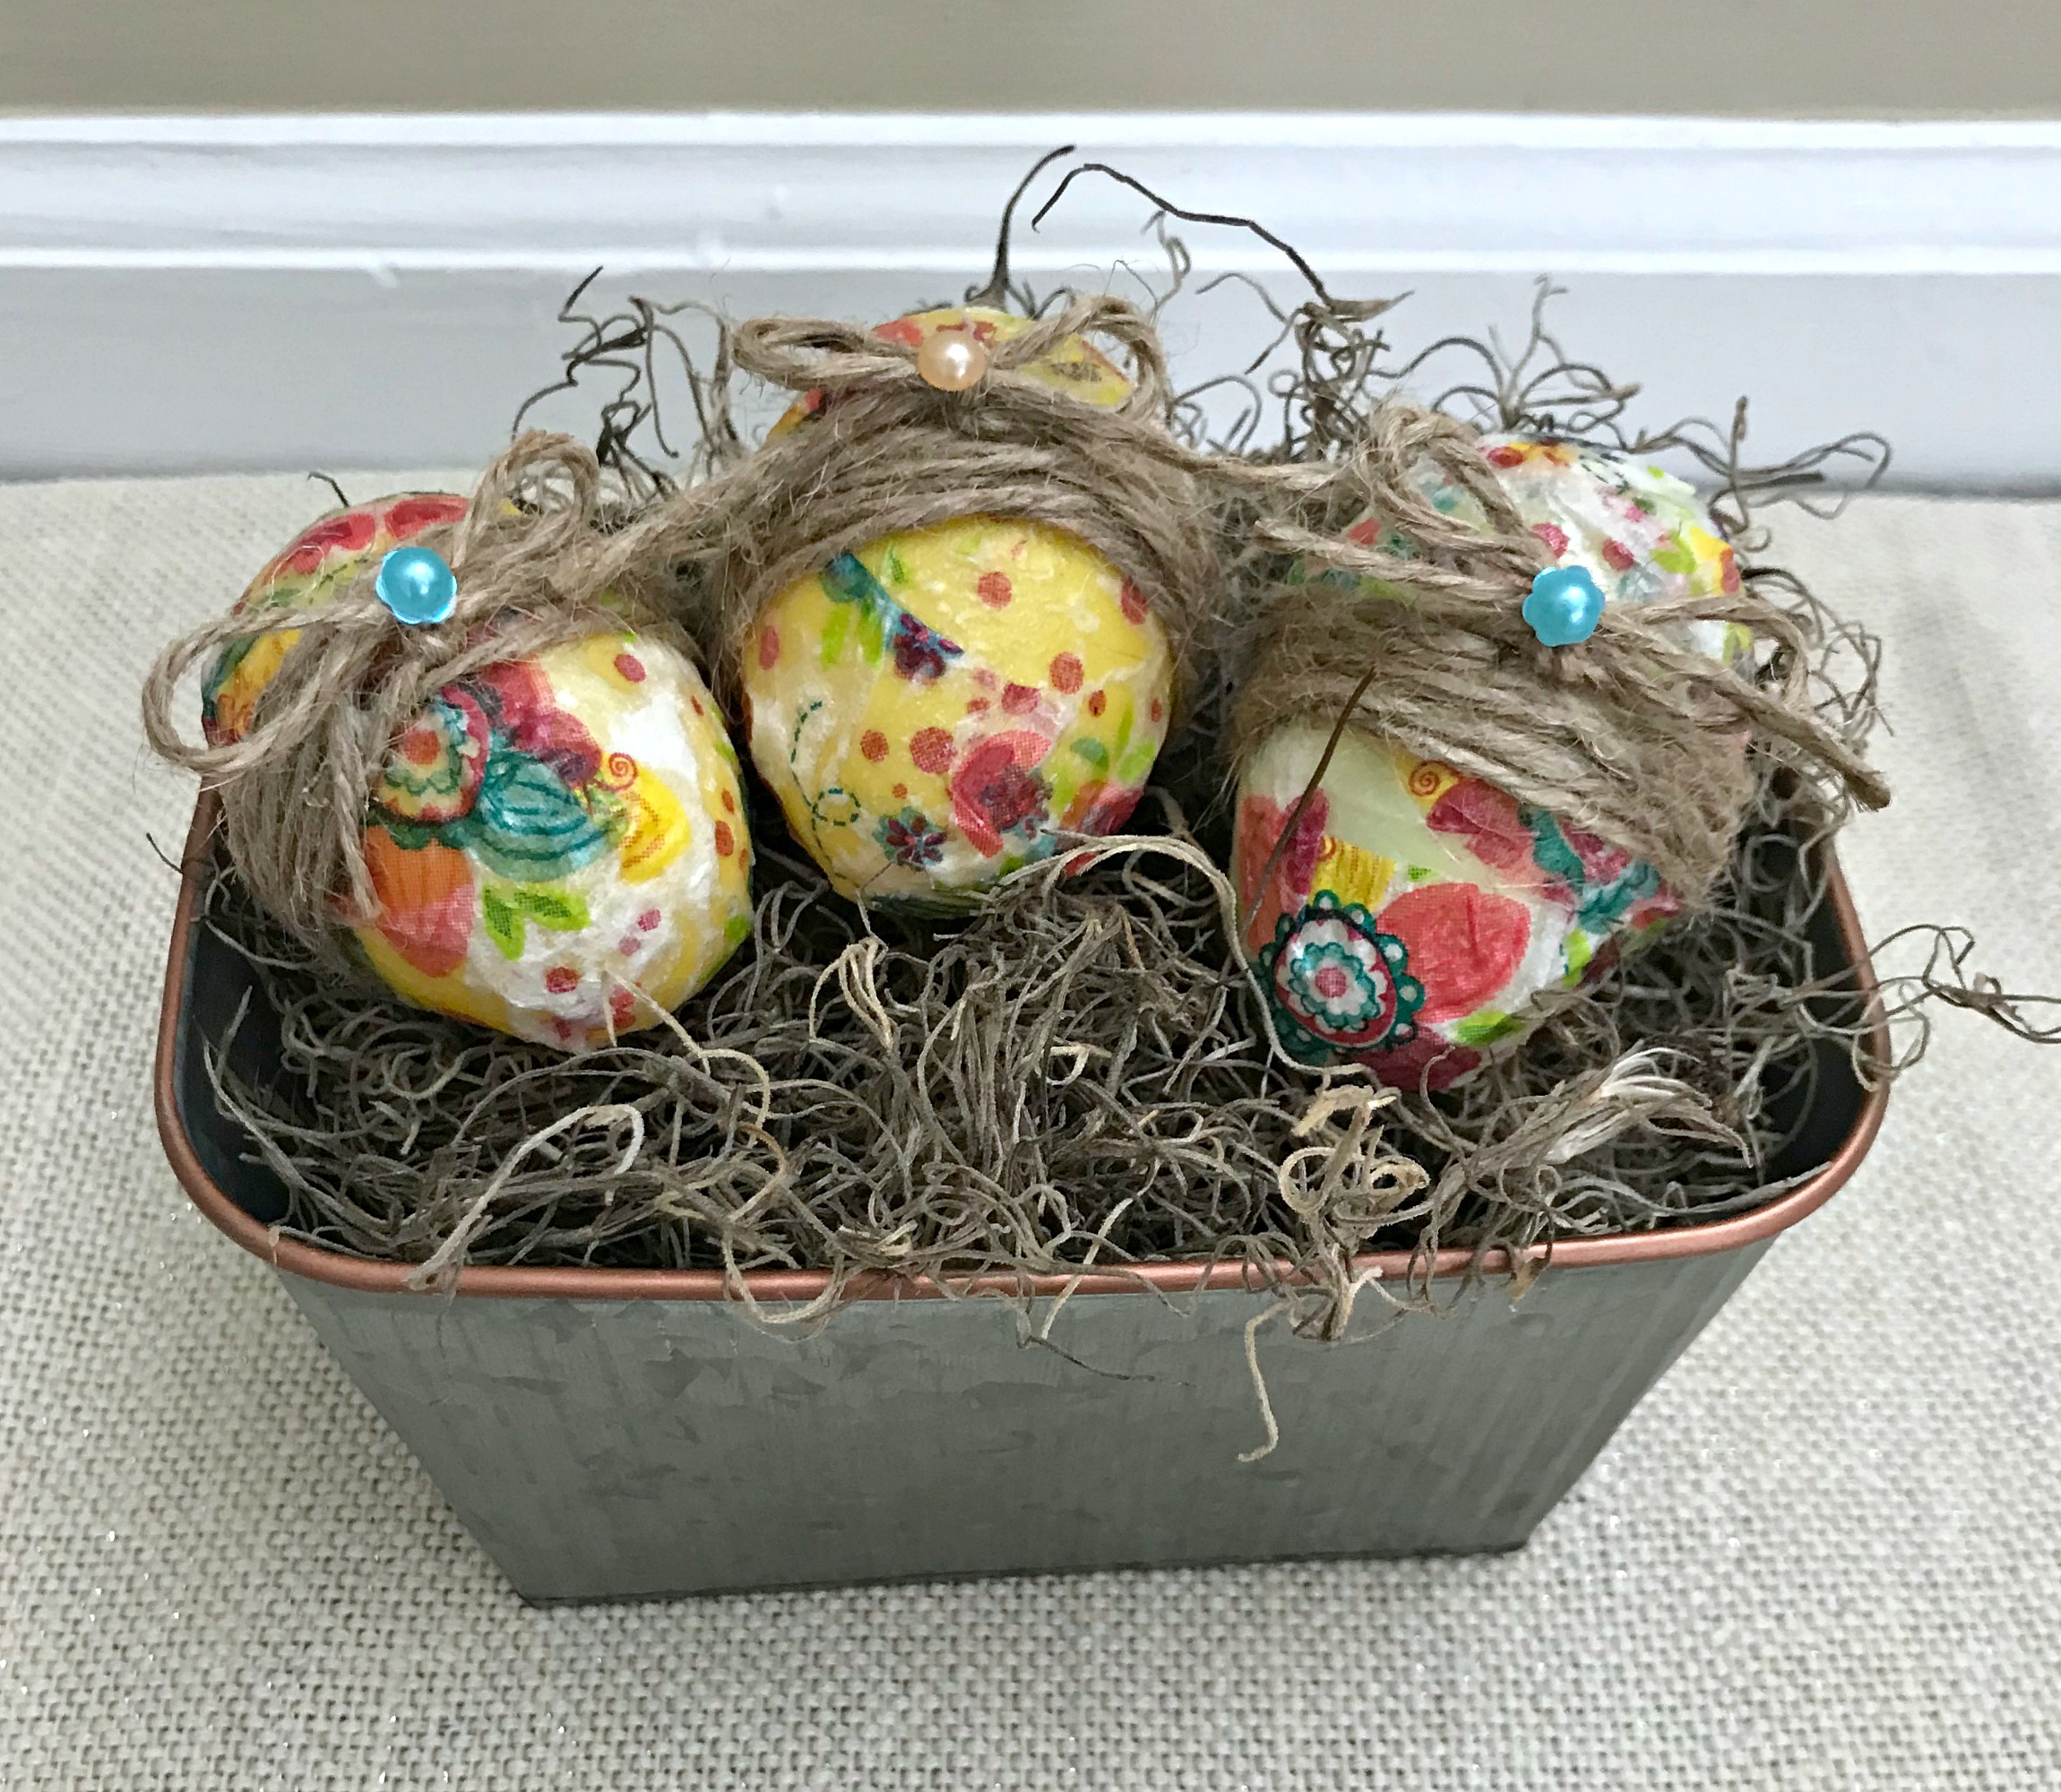
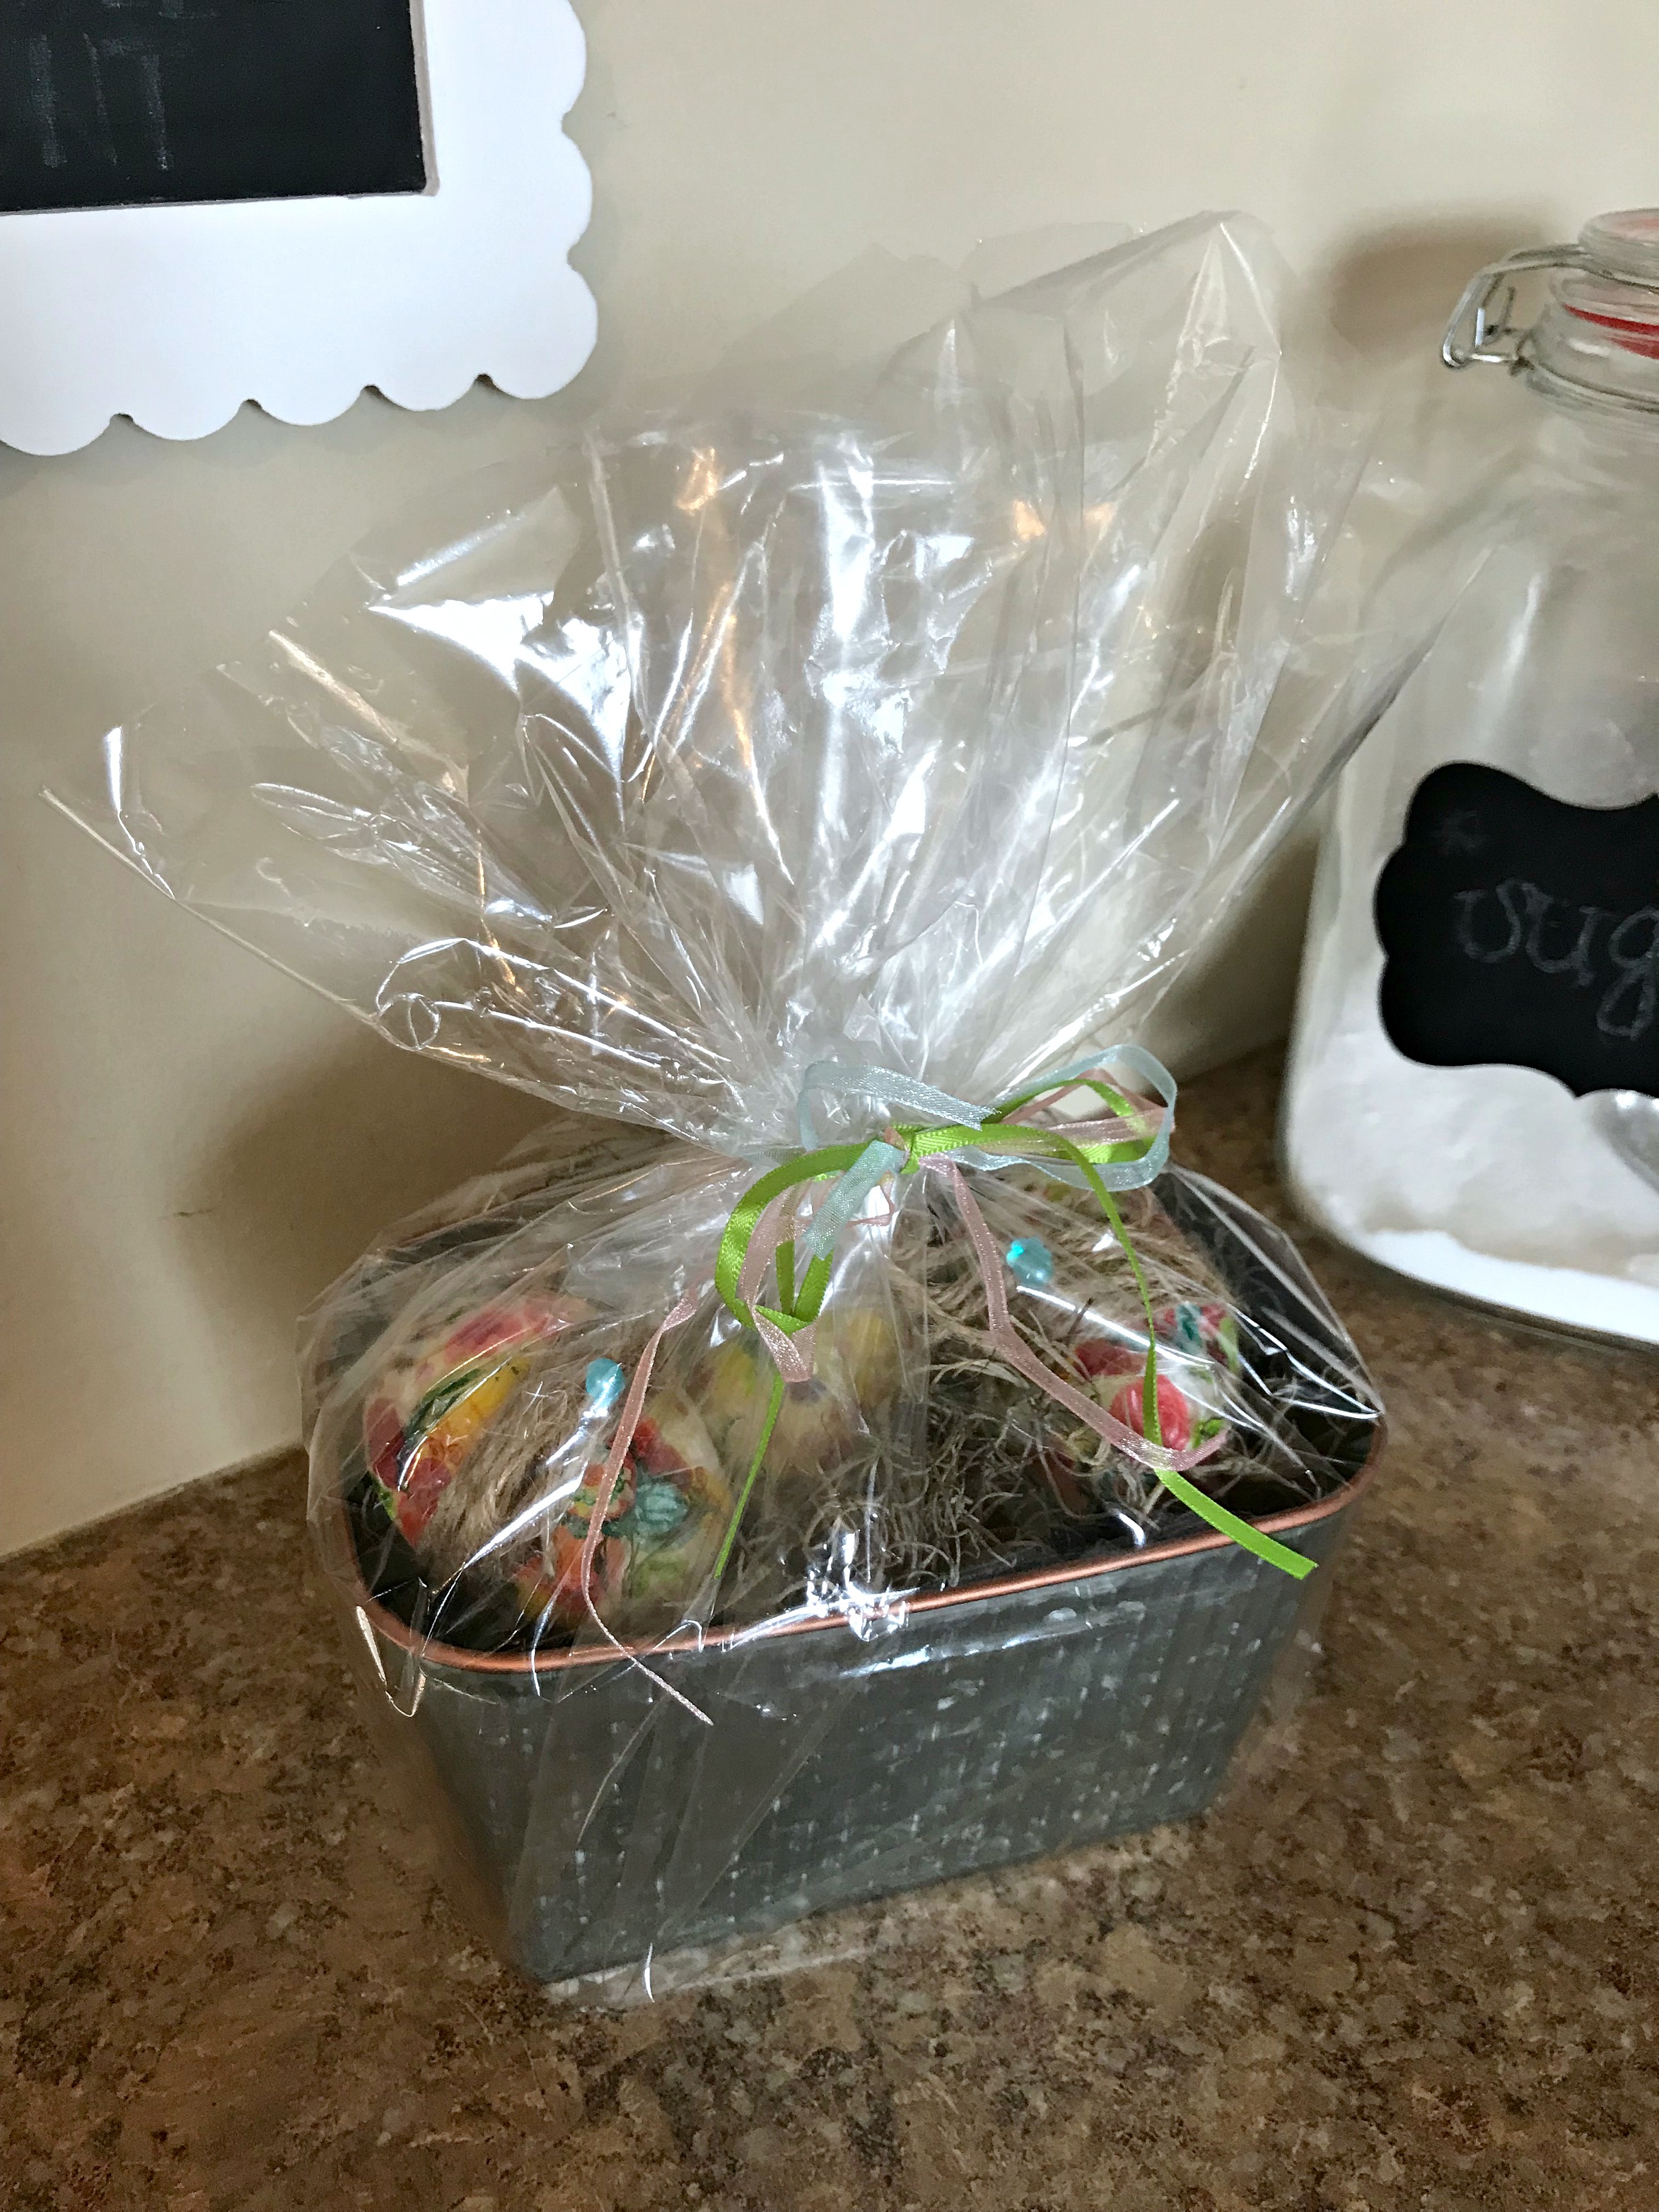
I decided to use my finished eggs as a hostess gift for someone who loves decorating for spring as much as I do! I picked up this darling galvanized container at Dollar General (it’s regularly $2.50, but I snagged it 50% off that day!). Adding a few handfuls of Dollar Tree moss really brought this little farmhouse-style DIY together!
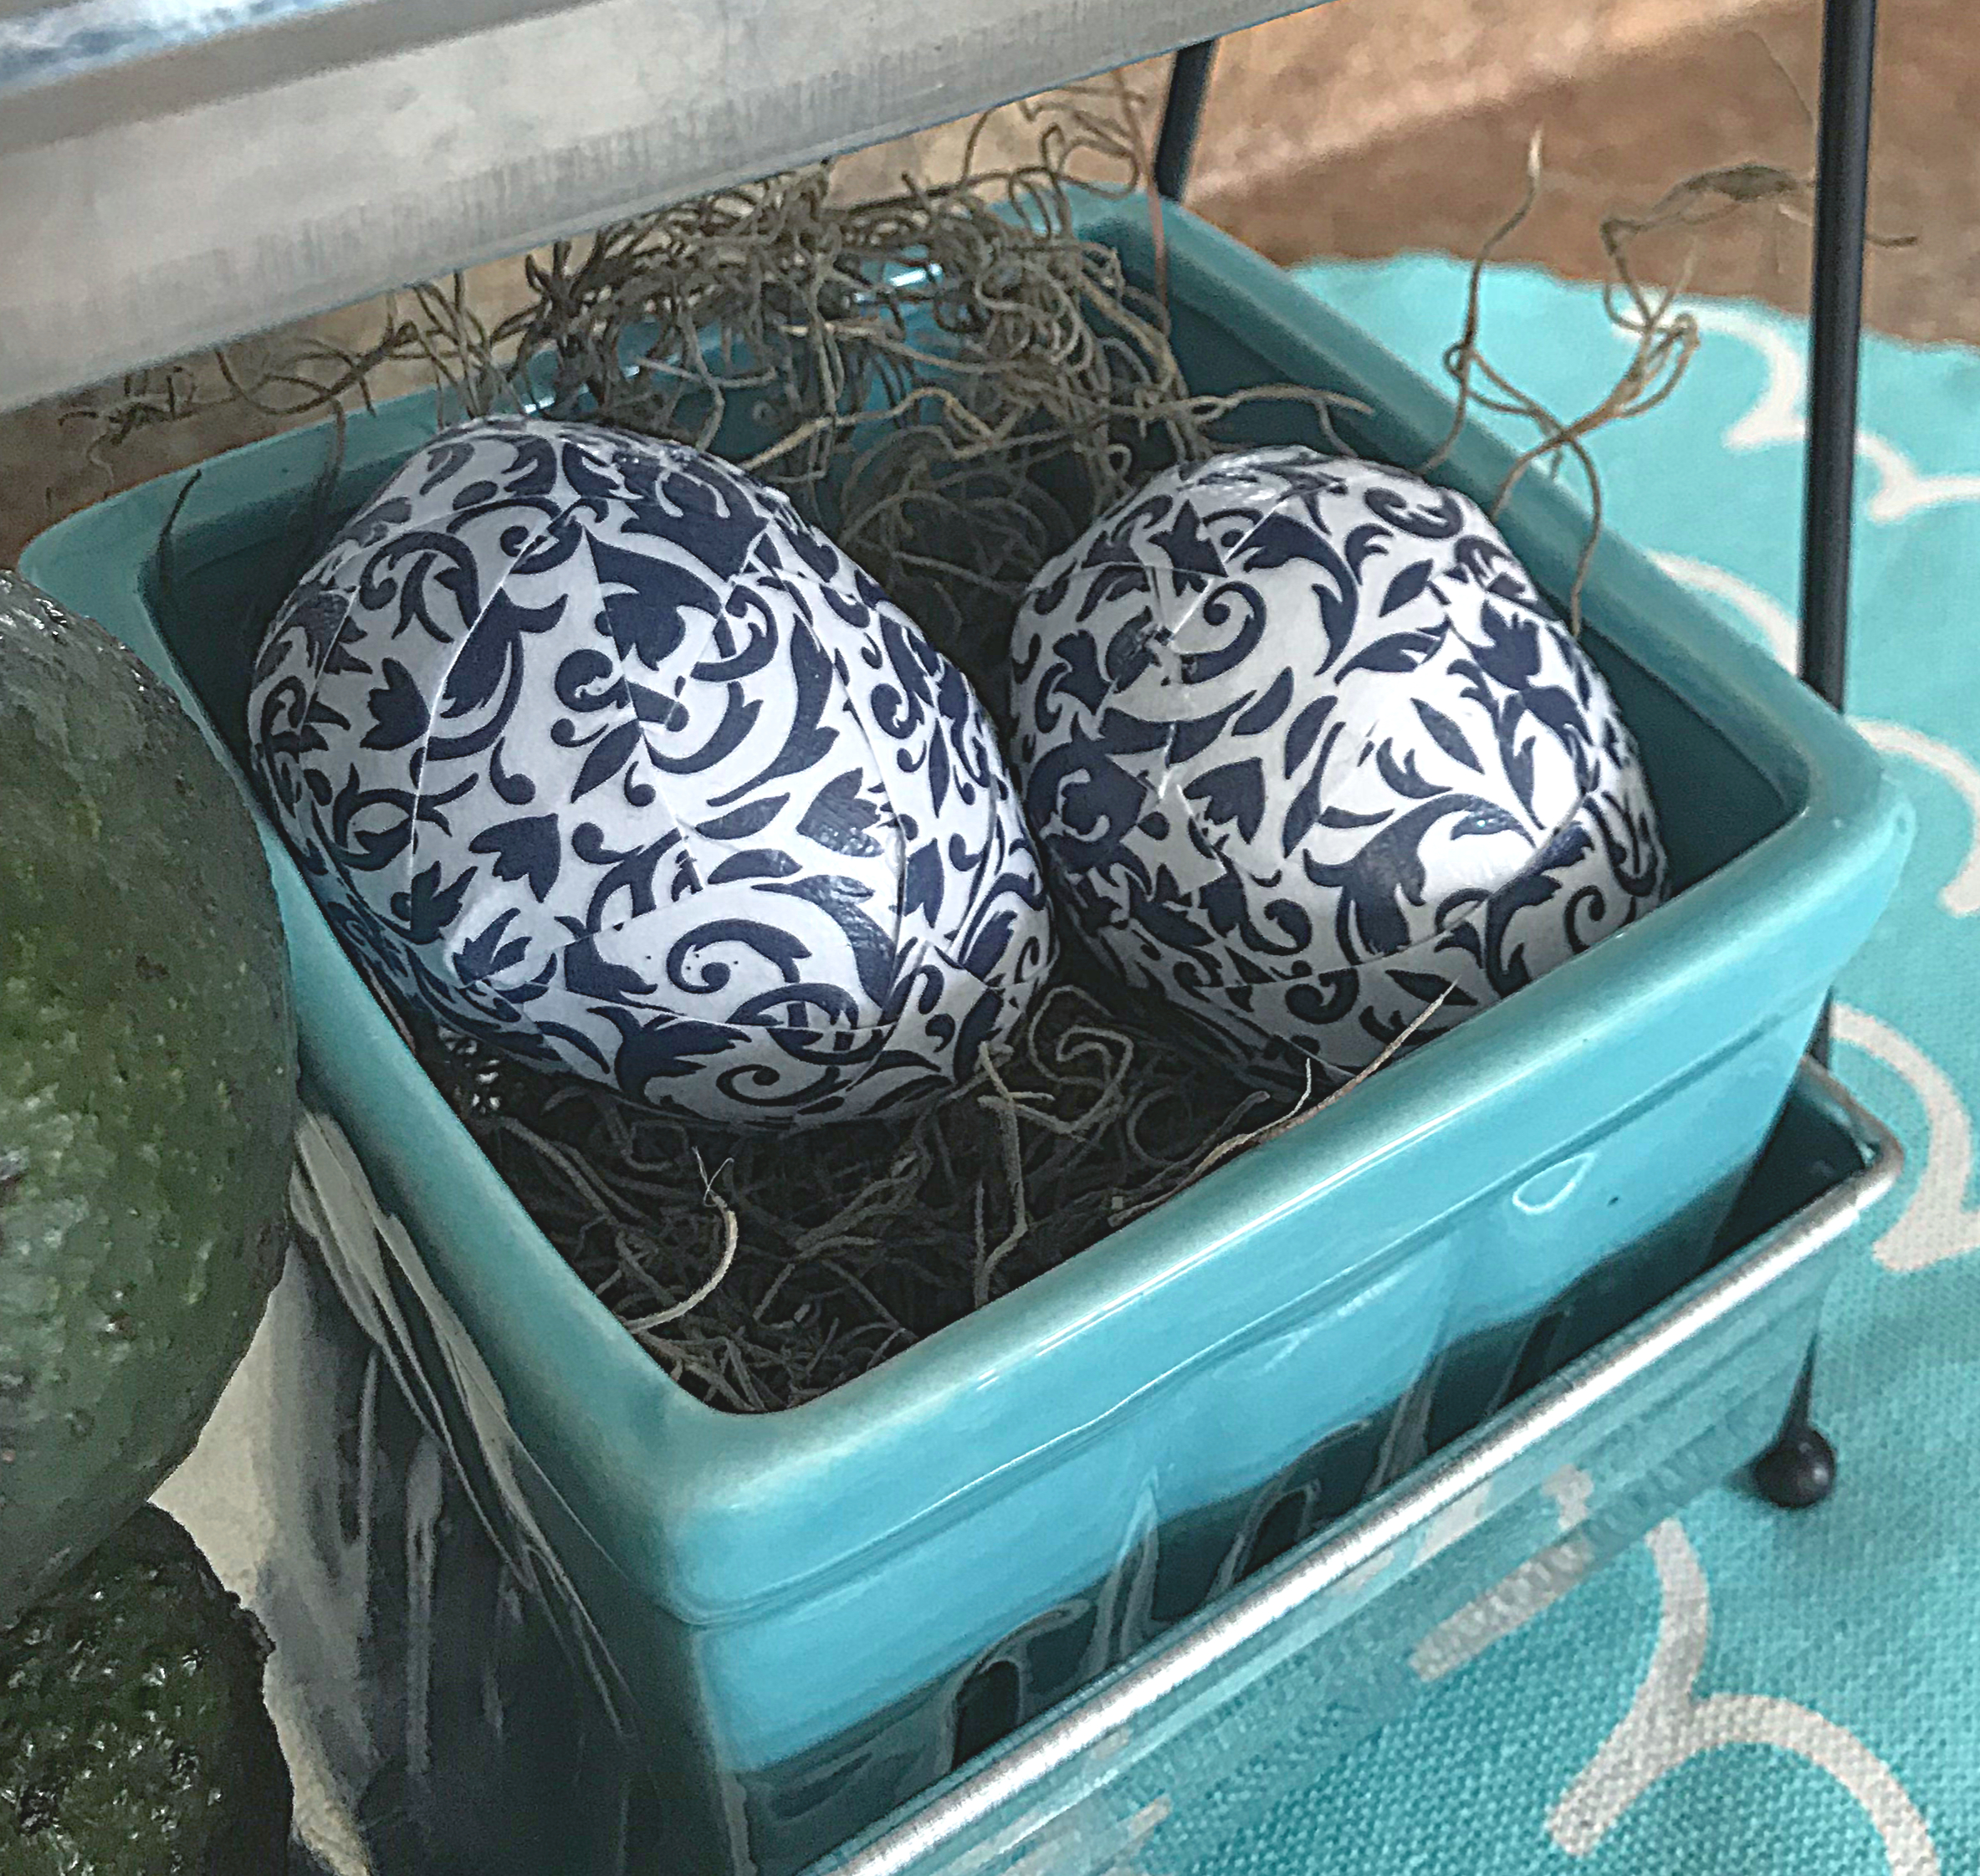
I made a set for myself as well – they are much simpler but are exactly what I wanted! These were made with scrapbooking paper I had on hand.
I hope you’ll give this little project a whirl! It’s a fun, simple way to incorporate spring decor that blends with the colors you already use in your home.


I’ll share this on Twitter. I LOVE them!
LikeLike
Thank you!
LikeLiked by 1 person
Well, if this is t the cutest thing! My 14 yr old daughter is going to love this! I already have everything on hand to make these so I see this happening this weekend!
LikeLike
Oh yay! I made a similar set like these with my Nana when I was in high school, and I love them. I bet your daughter will have a lot of fun with it! ❤
LikeLike
And you have said you aren’t crafty. LOL! These are darling. I did this same thing with sheet music years ago. It was easy and fun. Thanks for sharing.
LikeLike
I’m not crafty – but I like to dabble every once and a while! 🙂 Sheet music is a great idea!
LikeLike
The eggs are super cute! And you always have the best hostess gift ideas. (I needed a hostess gift last night. These would have been too cute!!) Sigh. So sweet that you take your mom hostess gifts:)
LikeLike
It’s really a fun tradition – we both have a stash of things we’ve picked up knowing the other would enjoy them!
LikeLike
I am going to give this a try Whitney. I used to make picture frames using this method back in the day I would buy cheap picture frames and dodge dodge napkins to the frame….they were really cute.
LikeLike
That’s a fun idea! You’ll have to post yours on Instagram when they’re finished! 🙂
LikeLike
I’m glad I was the “someone” who received your hostess gift! These turned out so cute! These are a great project and so pretty! Thank you for sharing the idea, but more so – thanks for sharing the finished product with me!!
LikeLike
❤ I hope you enjoy them!
LikeLike