
The principles for keeping a clean, clutter free refrigerator are the same as for any organizing project. Today I am taking you along with me as I clean out and re-organize my fridge, a project I try to tackle twice a year. It’s not fun, but the results are so worth it!
1. Take “before” pictures.

This might not look that bad to you, but trust me – it was nasty.
2. Take everything out of the fridge, throw away expired items and wipe all surfaces.
When I bought this fridge 2 years ago, I specifically chose the most basic model. I’m really glad I did because it’s so easy to clean. I only have two bins that have to be removed and washed, and the shelves are so easy to wipe down.
3. Give everything a place.

The only downside to the open shelves in the door is that small bottles slide right out the bottom. I solved that problem by inserting plastic organizers from the Dollar Tree (bottom right square in the picture above) to create a secure spot for those things to live.
I also like to use containers to corral like items, depending on what I usually have in my fridge. You can see above that I have a bin for lunch meat and a container for jelly. I’ve seen others use a lazy susan for corralling like items in the fridge, but I wanted something that had four sides and would keep the jars from falling over.
4. Communicate the organization system.
I like to label major areas of the fridge for two reasons – so we know where things are, and so we know where things go. You can see that most of the area in my fridge is still unspecified, but it helps to label the areas that hold the things you almost always have on hand.
5. Maintain the organization system.
My organizing mantra is, “An organized life requires maintenance.” Straighten the fridge and spot clean the shelves as needed. The contents of your fridge often change with the seasons, so be aware of things that need to be relocated or reorganized.
Make sure you snap an “after” picture. Step back and admire your work!
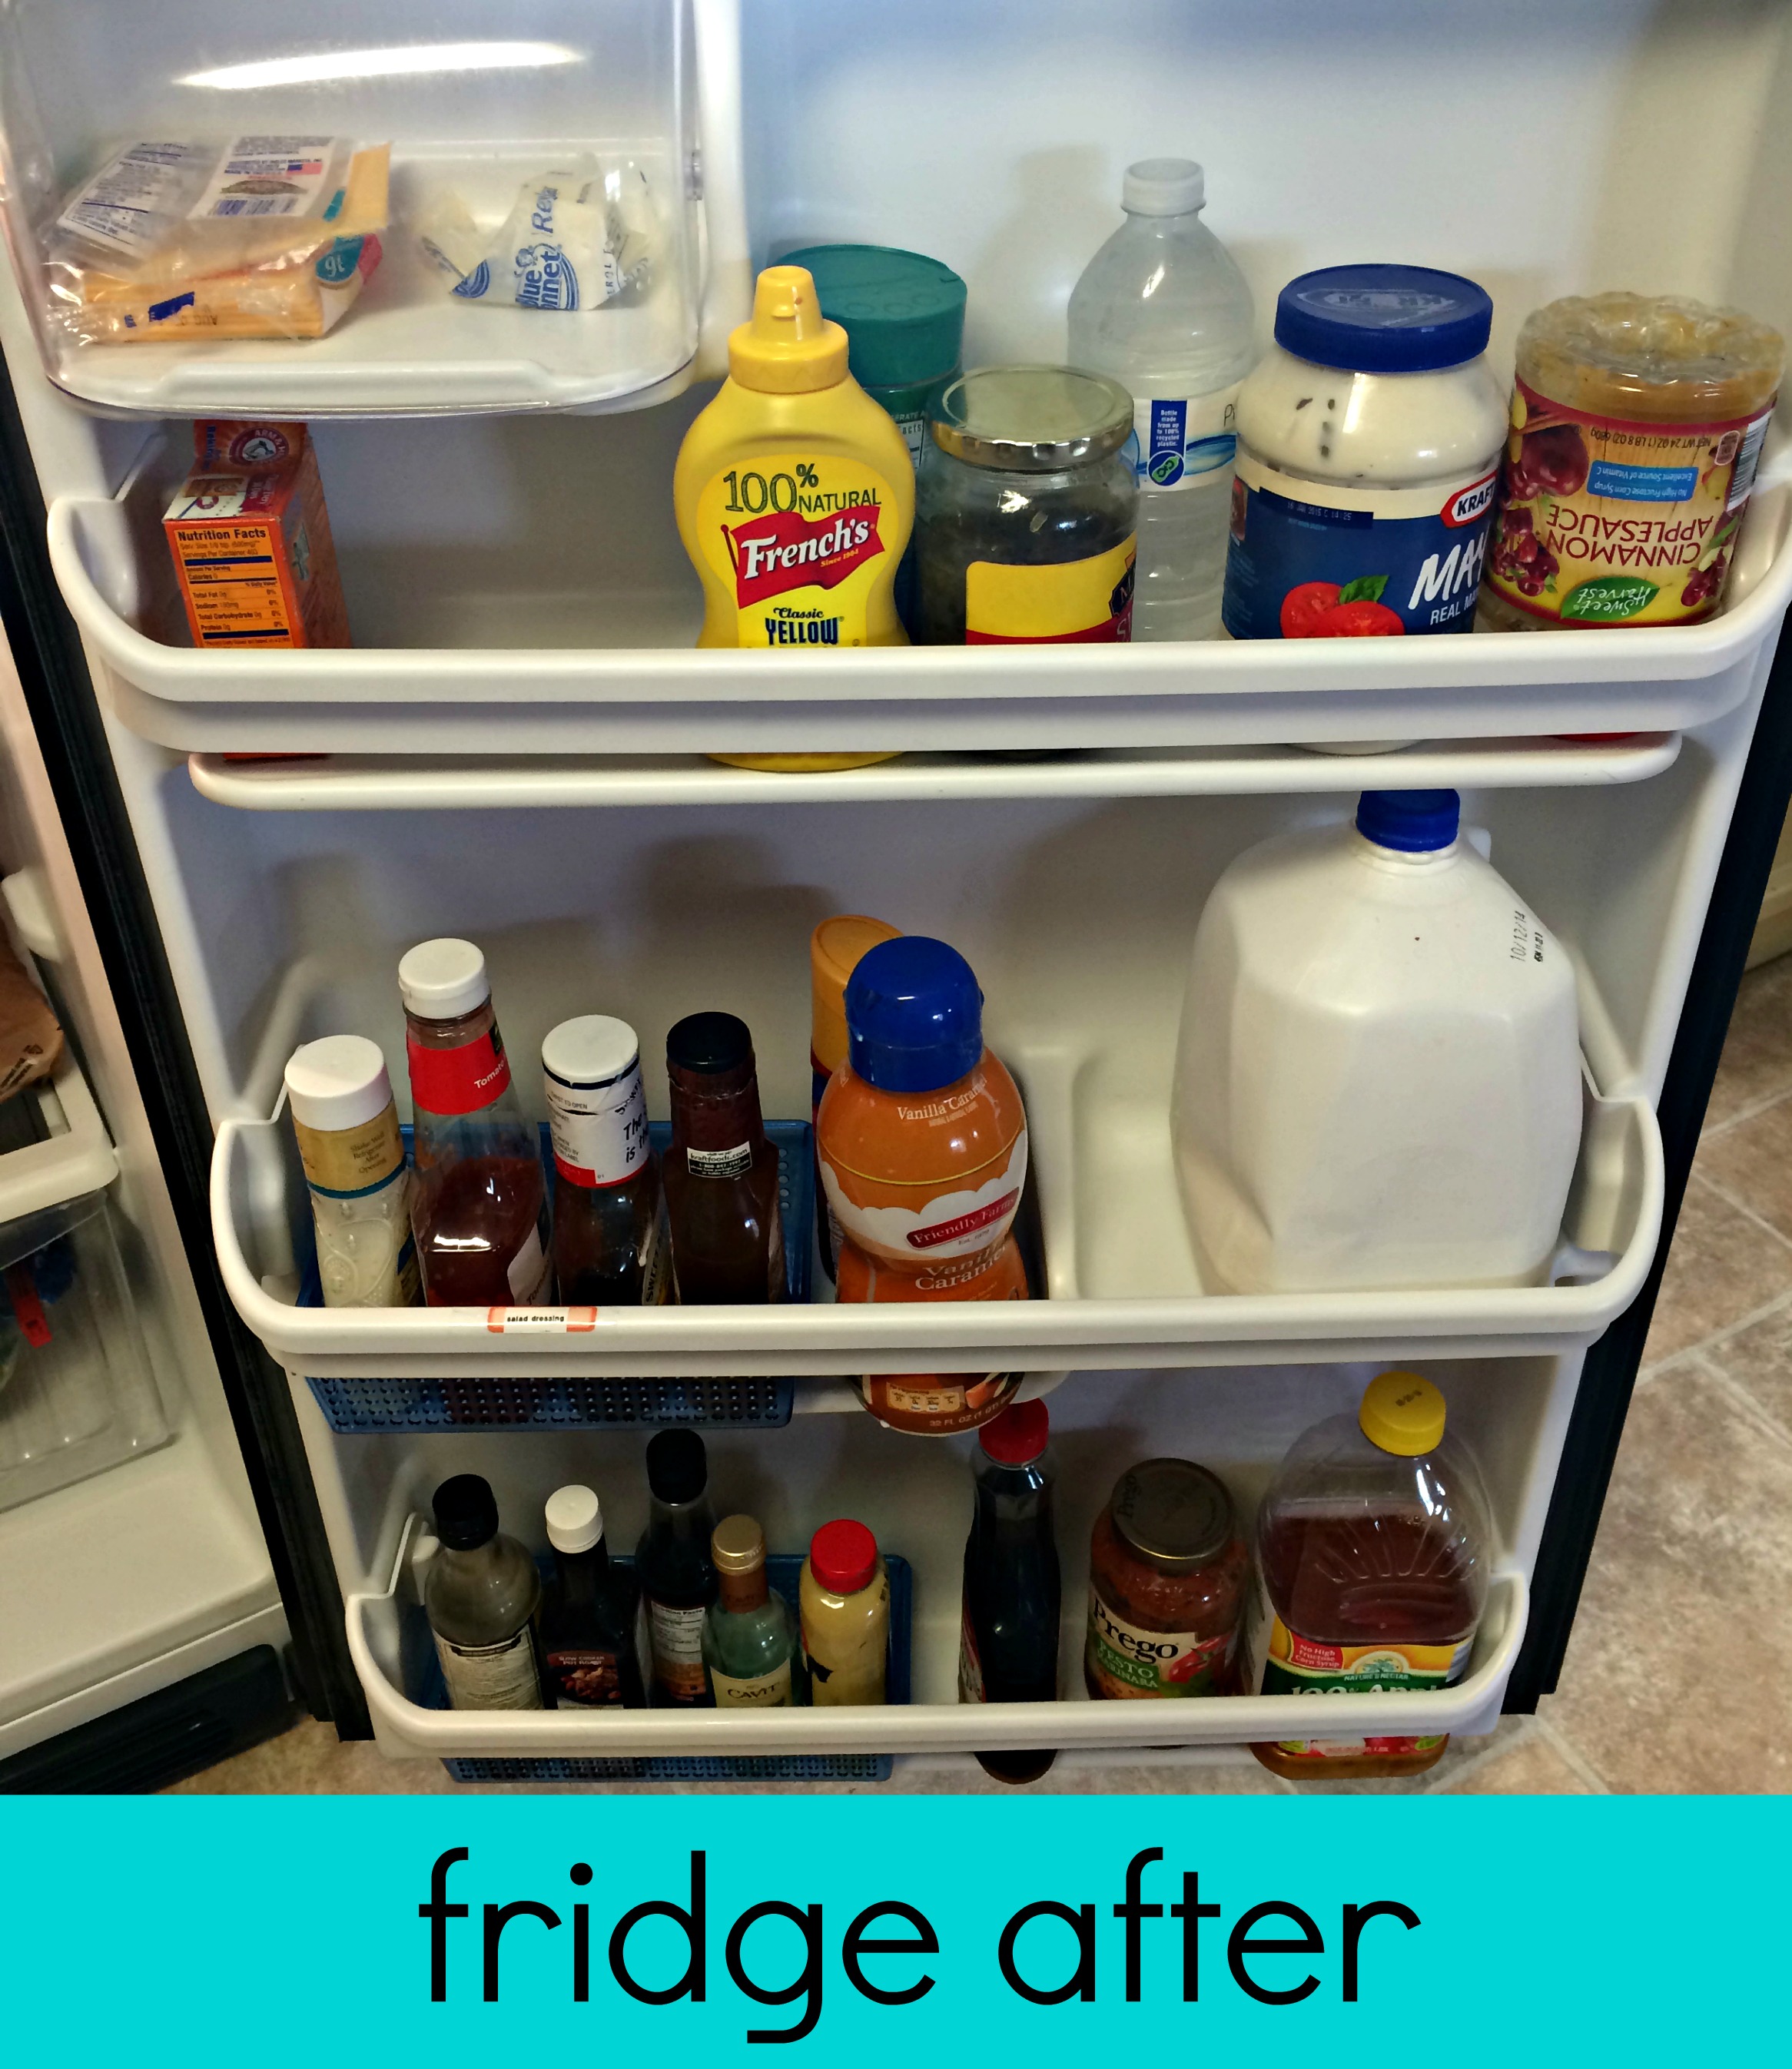

Much better! 🙂


Here’s my tip: I keep blue painter’s tape and a sharpie in a kitchen drawer and use them to label and date leftovers, example: Pumpkin Chili, 10/7. I’ve used food labeling tape but I find painter’s tape to be easier, cheaper, and more readily available. Whoever raids the fridge knows what’s in there without having to take the lids off; and I can keep an eye on the freshness without having to remember when I made the item.
That’s a great idea! Thanks for sharing!